January 8, 2025
How to Take a Screenshot on Your PC, Phone, or Tablet
Knowing how to grab screenshots is fundamental in today’s digital environment. Knowing how to record what’s on your screen will benefit you in many different contexts, whether your device is a computer, smartphone, or tablet. Often used to show how applications run, store critical data, or even gather proof of cyberbullying, screenshots show.
This article will lead you through the several ways to take screenshots on several devices so you will always be ready to grab whatever is on your screen.
What Is A Screenshot?
A screenshot—a screen capture—is a picture taken by your device to document the visible objects on your screen. The taken picture is kept as a graphic file that may be shared or altered as necessary. Depending on your device, screenshots can be obtained using particular key combinations, built-in tools, or apps.
Why Are Screenshots Important?
Screenshots let users record and store precisely what is shown on their device at any moment. There are various reasons this can be helpful.
- Learning and demonstrations: Tutorials or explanations of how particular apps or programs operate can be created with screenshots.
- Even if you’re offline, if you come across a significant document, picture, or piece of information, you can grab a screenshot to store it for later.
- Misconduct Evidence In cases of online harassment or cyberbullying, screenshots help to gather and save proof.
- Still, one should keep in mind that screenshots can be abused. Some may bring them to show embarrassing pictures or messages, which fuels more harassment or bullying. Particularly about cyberbullying, young people and parents should be aware of the advantages as well as possible drawbacks of screenshotting. Now, let’s explore how to grab screenshots on several devices.
Computer Screenshot Techniques: How to Take One
PC Windows
If you have a Windows PC, there are a few simple methods to grab a screenshot. Your version of Windows and the particular tools you use will affect these approaches somewhat.
Print Screen Button (PrtScn) usage.
- Pressing the Print Screen (PrtScn) key on your keyboard is one of the easiest approaches to grab a screenshot on a Windows PC.
- Usually found at the top right corner of your keyboard, this button is pressed, and it grabs the whole screen and replays it to your clipboard.
- You’ll have to copy the screenshot into a text or picture editing tool such as Microsoft Word, Paint, or Photoshop to save it.
On your keyboard, press PrtScn
- Launch an image editor or a document (like Paint or Microsoft Word).
- To copy the screenshot into the program, use Ctrl + V.
- Save the picture in a file on your computer.
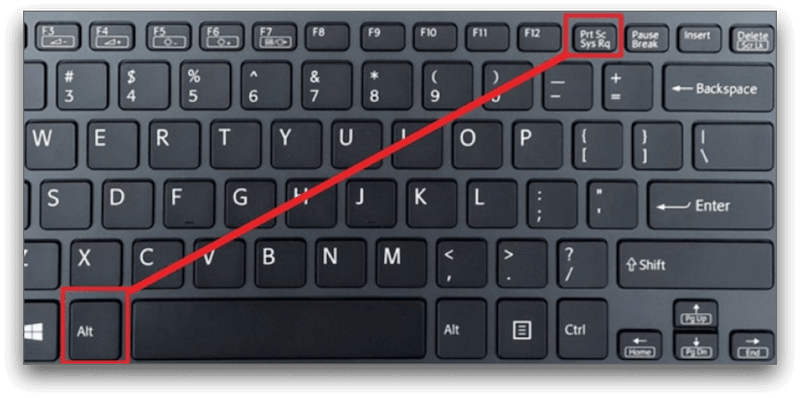
- Seizing Just the Active Window
- Press Alt + PrtScn if you want to record the window you are working on rather than your whole screen. You can then copy the active window to your clipboard straight onto an image editor or document.
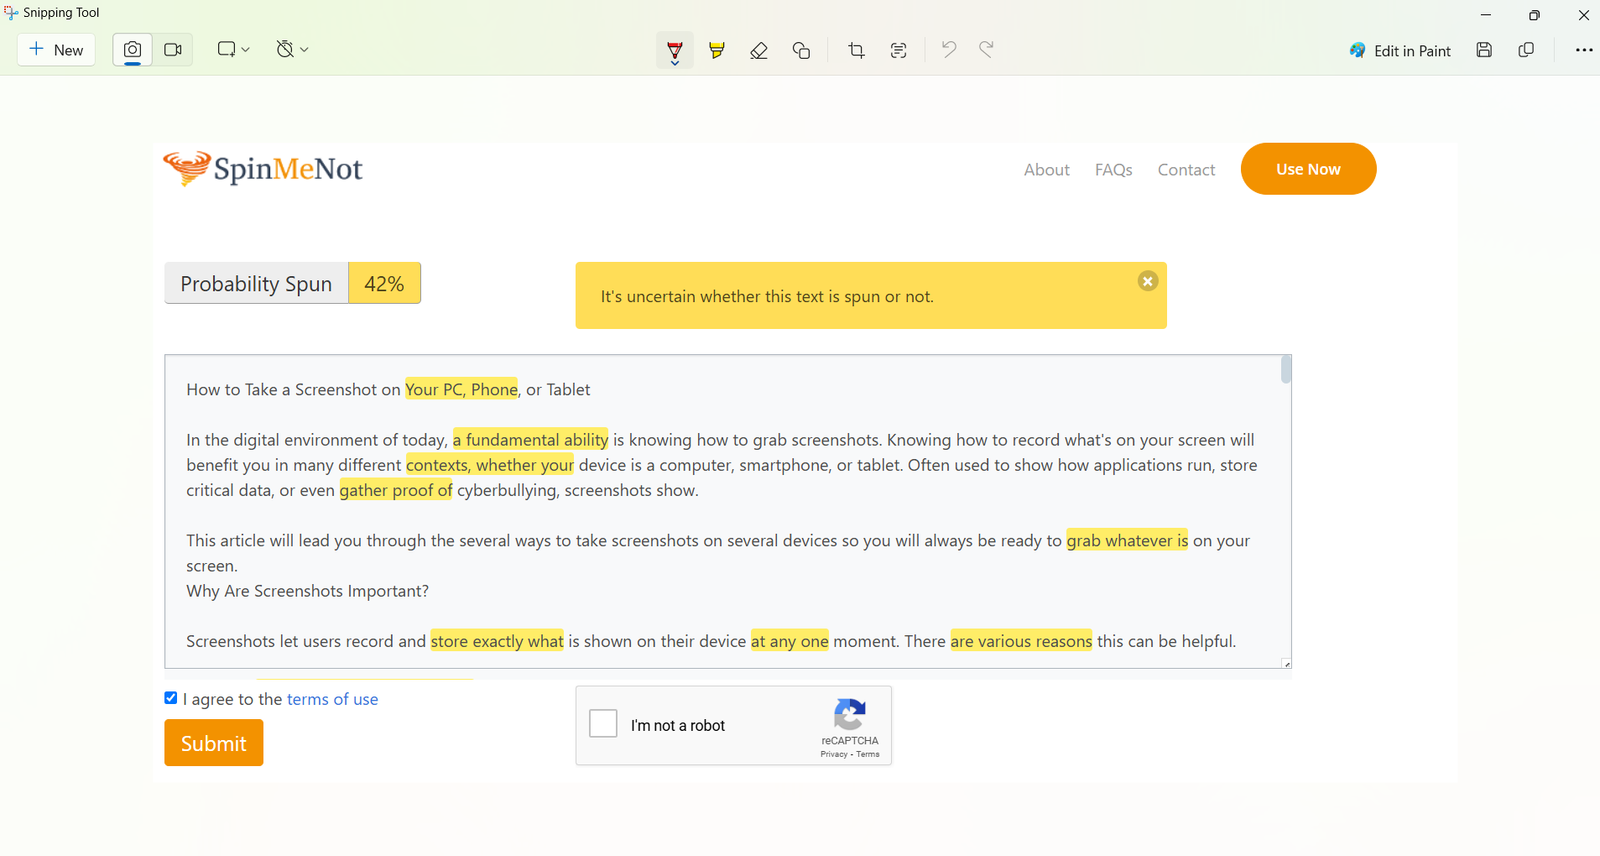
Using the Snipping Tool
Windows also provides the Snipping Tool for consumers who wish greater control over their screenshots. This built-in tool lets you save the screenshot straight, alter it, and grab particular portions of your screen.
- Launch the Snipping Tool from the Start Menu.
- To launch a fresh clip, click New.
- Drag your pointer to choose the region to capture.
- Save the screenshot or apply Snipping Tool editing tools.
- Note: Consult your laptop’s user manual for other key combinations should it lack a Print Screen key.
Mac Devices
With a few valuable shortcuts integrated into the operating system, Mac users find taking a screenshot to be as easy.
Filming the Whole Screen
- Press Command + Shift + 3 to grab a copy of your whole screen.
- The screenshot will save itself on your desktop automatically as a.png file.
Seizing a Selected Area
- Press Command + Shift + 4 to capture just a portion of your screen. This will make your pointer a crosshair so you may choose the area you wish to photograph.
- The image will be saved to your desktop once you have chosen it.
Grab Tool Application:
- Grab, a built-in utility accessible on Mac computers, will help you have more control over your screenshots.
- Grab lets you snap timed snapshots or screenshots of particular windows as needed.
Open Grab from the folder on applications.
- Choose the kind of snapshot you need from the Capture option—window, selection, or screen.
- Save the screenshot right away upon capture.
Taking a Screenshot on Tablets and Smartphones: Techniques
Grabbing screenshots on tablets and cellphones could differ depending on the device and running system. On some of the most often-used devices, here’s how to grab screenshots:
Android Equipment
Usually, for most Android phones and tablets, the conventional approach for grabbing a screenshot is:
- Press the Volume Down button simultaneously with the Power button.
- Hold them for a second till the screen flashes or you hear a camera shutter sound.
- The screenshot will immediately save itself in your gallery or picture app once it is taken.
iOS Devices (iPhone and iPad)
The procedure for iPhones and iPads is somewhat similar to that of Android devices:
- Simultaneously, press earlier smartphones’ Home and Side buttons—or Top buttons. Press the Side and Volume Up buttons if you own an iPhone X or later.
- Fast button release will cause your screen to flash.
- Your Photos tool will immediately save the screenshot.
How is the phone screen?
Modern cell phones go beyond screenshots to include screen recording features. For training, demos, or game recording, screen recording lets you capture what’s happening on your screen into a video.
iOS track recording for screens
The screen recording capability of iPhones running iOS 11 or later is built-in.
- See Settings > Control Centre > Customize Controls.
- Include screen recording in your control centre.
- Access the Control Centre by swiping from the bottom of your screen (or from the top-right on more recent models).
- Starting recording your screen, tap the Record button—a circle icon.
- Tap the red status bar at the top of your screen to stop recording.
Android Recording of the Screen
Most Android devices require downloading a third-party app to log your screen. Meanwhile, some recent Android models provide a built-in screen recorder accessible from the quick settings menu.
- To reach the fast settings menu, sweep down from the top of your screen.
- Seek the Screen Recorder choice and tap it.
- Start recording after selecting your recording settings—those for audio recording.
Conclusion
Capturing and distributing knowledge can be significantly aided by screenshots and screen recording. Whether you use a tablet, smartphone, or computer, understanding how fast you can catch what is on your screen will save you time and enable you to record significant events. Any device will let you quickly capture, save, and distribute screenshots using the techniques described in this book.